
Knowledgebase Article
In Office 365 you may have a shared mailbox (for example orhelpdesk@osu.edu) or you may be temporarily responsible for another employees mailbox and need to send an email either as them directly, or on behalf of them. If you’ve been granted sufficient access to the mailbox in question you can do this relatively easily. This post will go over how you can do this across the multiple ways you may use your Office 365 account.
Using the Outlook desktop (PC) app
- Begin composing a new email
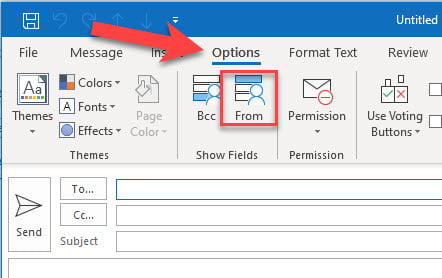
- If you don’t have the From field enabled, click Options on the ribbon then click the From button listed under the Show Fields section
- You should see a new option just above the To… field when composing an email now that says From. Click on it then click Other Email Address…
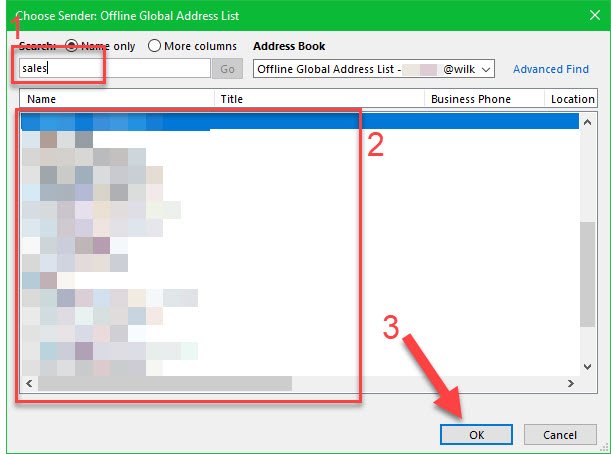
- Click the From… button to open the address list, locate the mailbox you’ll be sending as, click on it then click OK in the bottom right of the window. You should see the mailbox name in the From… field that was previously blank, click OK now
- Now the From… field (the one above the To… field) should display the email address you will be sending the message as. Finish writing the email and then click Send when you’re done and the message will be sent as the specified email address


(Click on an image to enlarge it)
Using the Outlook on the web (webmail)
- Click the New message button to begin composing a new email message
- Just above the To field, click on the ellipses icon ( … ) and then click Show From
- Click the newly visible From button then Other email address…
- Type the email address you’re going to be sending as, if a suggestion doesn’t appear you can click on the Use this address: option, otherwise click on the suggested mailbox if it appears
- Finish typing up the email and click Send when you’re ready, the email message will send from the specified email address you entered in the From field


(Click on an image to enlarge it)
Using the Outlook mobile app
Note: The mobile app is a little more limited with regards to the ability to send as a separate mailbox at the moment. In order to have the option to send as another mailbox you must have the other mailbox already configured in the app, please refer to Microsoft's article(s) on adding another account or adding shared mailbox on the app (iOS) for help with this.
- Tap the new message button in the bottom-right to begin composing a new message
- Along the top near where it says New message tap on your email address
- Tap the email address from the list you’d like to send as
- Finish composing the email and tap the paper airplane icon in the top-right when finished and the message will send as the address you selected


(Click on an image to enlarge it)
Using Outlook for MacOS
Note: Outlook for MacOS requires you to have the separate email account already configured in the application in order to send as the account. If you need help adding a shared mailbox please refer to Microsoft's article here for that
- Click the New Email button to begin composing a new email message
- Click the existing address displayed in the From field, then select the account you wish to send as
- Finish composing your message and click Send, the message will send as the email address you had chosen


(Click on an image to enlarge it)